Adventures of Eating with dReJ: healthy, cheap, delicious

Posts tagged ‘lunch at work’

Gallery

Cauliflower Rice

Try cauliflower rice instead of actual rice! Perfect low carb or low calorie option!


Since we’ve been doing the Paleo/Primal inspired eating, we’ve looked for ways to still enjoy some of our favorite meals like stir fry with rice, shrimp-n-grits – you know – the good stuff! So we aren’t eating any grains, so rice is out of the question. Corn in moderation so grits aren’t all that great of a replacement either.

I stumbled across something called Cauliflower Rice and despite the fact I am not a huge cauliflower fan, I figured why not give it a try? I used it in one of my primal quiche recipes and the flavor wasn’t overwhelming at all, so we decided to go for it as the accompaniment to our shrimp stir fry meal this week.

It is SUPER easy to do, and even if you aren’t avoiding wheat and grains – it’s a great way to knock out a TON of extra calories and that crazy full feeling you get when you eat all that rice. This also works for vegetarians and vegans! So anytime you see a recipe that calls for serving your food on a bed of rice, couscous, grits, etc – just sub this instead! You can easily bring it to work and heat it up again – still tasty!
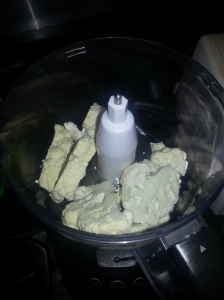
 

Put small roughly chopped pieces of cauliflower into your food processor. I did mine is several smaller batches to make sure I didn’t miss any big pieces!


The cauliflower should be like a grits/couscous sort of texture.

Once you have processed the cauliflower, put in microwavable bowl with lid and heat for 5-6 minutes. DO NOT ADD WATER! Once it’s done – season like you would regular rice and serve!

Enjoy!

Primal Meatloaf (with Brie & Mushrooms!)

I mentioned I was going to try out this recipe a few days ago and had several people ask for the recipe or to share how it went. We made it over the weekend and I ate it yesterday for lunch, so I feel more confident in sharing the recipe and results now!

Right out of the crockpot!


I can’t take credit for the idea – I found the recipe at PaleoPot and you can see the original post here. As usual, we made a few changes so I’ll include the original recipe and our changes in Green so you can take it or leave it, or invent your own variation!

What you need:

  • 1.5 pounds of 90/10 grass fed ground beef. Leaner cuts work better as the extra fat simply runs off in cooking anyways. (We used a mixture of beef and pork for ours)
  • 1 whole egg
  • 4 cups of button mushrooms. Any fungi of your choice will work fine. Buy less mushrooms if you are afraid of having extras! (I bought pre sliced mushrooms and used about 8-10 oz)
  • 1 small log of brie or goat cheese. Usually 2 to 4 ounces. Trader Joe’s sourced my small log of brie this time. (I used 40z of brie, found it at Harris Teeter!)
  • 1/8 cup granulated garlic (We used minced garlic from a jar – and we used probably 1-2 TBSP because we heart garlic)
  • 1/8 cup dried parsley (We didn’t have any of this in our spice cabinet, so we left it out)
  • 2 tbsp dried oregano (We grow  this, so we used fresh!)
  • 1 tbsp dried rosemary (again, spice fail! Didn’t have this one, and our rosemary isn’t growing very well…so we left it out)
  • pinch of sea salt and black pepper

Make this quick:

  1. By hand, mix together your beef with your egg and spices. Everything but the mushrooms and the cheese.
  2. Once mixed, press the meat mixture down into the bowl to flatten it out as evenly as possible. This also works on a countertop, yet I prefer to just get it done in the bowl for easy cleanup.
  3. Cut your mushrooms lengthwise into slices. Think pizza topping slices.
  4. Place your log of brie in the center of your flattened meat mixture, and fold the meat around it, fully encasing the cheese.
  5. Make sure your cheese is fully covered by meat, and if there is a “seam” or place where the cheese is closest to the surface, this place will be facing up in your slow cooker.
  6. Press your mushroom slices into the exterior of your meatloaf. The goal is to have the entire outside encased in mushroom slices, held only by the meat mixture.
  7. Cook on low for 6 hours. (We cooked ours for longer since we wanted to make sure the pork was completely cooked!)

As it’s cooking, some fat will run off and some cheese may ozz out. Just put it on top because Brie is amazing!


This was quite tasty – and easy to put in a to-go container for a work lunch or quick dinner. I would definitely use the herbs/spices recommended, or jazz it up with whatever you have on hand so you are still getting some yummy flavors. The first bit of the meatloaf, I was thinking – this is okay. Then the next bite, I got some brie and then I was thinking: YUM! So You may be want to put more cheese in it, or make sure it’s spread all the way through when you are prepping so that every bite is delicious! You could certainly experiment with different cheeses as well. I know my hubby was worried that it would crumble since we weren’t using breadcrumbs or anything, but it really wasn’t a problem! The mushrooms stick to the outside and it really did pop out of the slow cooker all in one piece!

Hope everyone enjoys this recipe and that you’ll pop over to Paleo Pot as well for more slow cooker ideas that fit in with a wheat free, primal/paleo diet! Isn’t it fun when your chosen eating style is also exceptionally delicious!?


Easy Curry (Paleo & Wheat-Free Friendly)

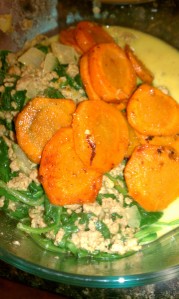
Quick Curry with Carrots


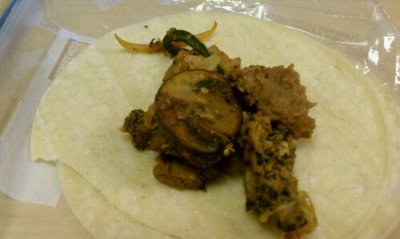
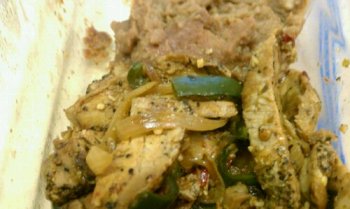
This weekend I selected a Quick Curry meal to be one of our lunch dishes for the week. It was really simple to make and didn’t take a long time or weird ingredients either. I found this recipe in the book: The Paleo Solution by Robb Wolf that I just finished reading.

Here’s what you need (and then below I’ll tell you what I added):

1 lb ground pork (you could use lamb, chicken, turkey, stew beef)
1 tbsp olive oil
1-2 tbsp curry powder
1 bag baby spinach (14 oz)
1/2 can coconut milk (7 oz)
2-3 cloves garlic


I felt like that wasn’t going to be filling enough for lunch – so I sauteed some carrots (bought fresh from the farmer’s market) with a little garlic, cumin & paprika seasoning and added those to the top of the dish. I also added some yellow onion to ours.

How to make it:

Easy peasy in the skillet


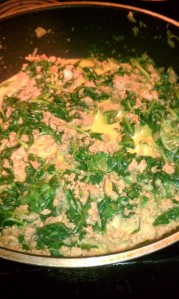
Cook up the meat in a pan with olive oil. Add the curry powder as the meat browns – mixing well. Be sure to break up any large pieces of meat – it needs to  be pretty crumbled up. If you are going to add onions – now is the time! Once the meat is browned, add all the spinach and coconut milk and heat until the spinach has wilted. Add garlic at the end (if you use fresh garlic – mince it or use a garlic press to crush it). Mix well, remove from heat and serve.

We ate this yesterday for lunch (just zapped it in the microwave at work!) and it was pretty good to not have any starches in it. When I think of curry dishes, I expect there to be rice – so this was definitely a change, but it was still a yummy meal. I sort of wanted MORE of it, but I’m guessing that my body will adjust after a week or so without the carbs from starches. Of course, if you aren’t avoiding grains – you could add some rice to this easily and make it work for your eating style.


We used ground turkey because the store didn’t have ground pork or chicken & we were lazy and didn’t feel like grinding it ourselves. I think pork/chicken might have a better flavor – but the turkey worked well if that’s what you have on hand!

There you go – super simple! The only thing you might have to go looking for is some coconut milk (hint: look in the international aisle with the Asian stuff).

Enjoy!


Summer Squash and Broccoli Casserole

We’ve been getting a lot of squash and zucchini in our Spring CSA box the last few weeks. So we decided to put it to good use as a side this week for our meals. We found a makeover recipe that sounded tasty and gave it a whirl. Obviously we are sharing it with you because it was super simple and delicious….and of course – healthy!

The recipe comes from Taste of Home and you can view the original recipe here.

We made a few changes so I’m listing the ingredients and showing you our changes:

This recipe makes 15 servings – we cut this in half, so please make sure you take that into account if you want to make this!

Ingredients

  • 3 pounds yellow summer squash, cut into 1/4-inch slices
  • 2 medium onions, sliced (we used both red and yellow onion)
  • 2 tablespoons butter, divided (we used less better than this)
  • 2 garlic cloves, minced
  • 6 tablespoons all-purpose flour
  • 4 eggs
  • 4 egg whites
  • 2 cups 2% milk
  • 4 cups (16 ounces) shredded sharp cheddar cheese
  • 1/4 teaspoon salt
  • 1/8 teaspoon pepper
  • 12 reduced-fat butter-flavored crackers, crushed (we didn’t crush ours – see picture!)
  • We added about 1.5 cups (uncooked) broccoli (sans stems) to the very top of this mixture (well, right under the cracker “crust

Up close so you can see the yummy layers

We followed the directions provided on the website pretty faithfully other than reducing the amount of butter (since we didn’t make the crust “crushed” there was no reason to add the extra butter to the crackers) and adding broccoli. We actually added broccoli after we poured the egg/flour mixture on top of the squash/onions, but you could certainly add the broccoli before pouring the mixture over everything. I think it would taste good either way.

We had it on the side of our grilled hamburgers last night and it was super yum. We give this 2 dReJ thumbs up. At about 200 calories per serving this is a great side dish for a meal or a fun potluck dish to bring to share at a party.

Shrimp-n-Grits…and Chorizo!

In the south, it’s no big  thing to have Shrimp and Grits – it seems a common option when going out to eat. But it’s one I tend to avoid because I know it’s full of calories and fat I don’t really need. We are all about trimming down the calories and fat on some classics so you can enjoy them without the guilt!

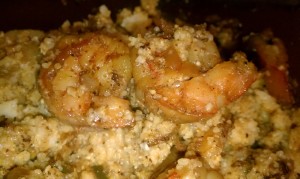
So today – here’s our take on Shrimp n Grits. I’m actually eating it for lunch RIGHT now and it’s so delicious, I have to share.

Delicious!

What you need:

2-3 oz Chorizo (our grocery store had this near the hotdog/specialty gourmet chicken sausages)
1 onion (yellow) – chopped
1 lb shrimp
1 green pepper – chopped
1 hot pepper such as jalapeno (optional)
1 tbsp minced Garlic (or to taste, we are garlic lovers)
1 tsp Cumin
1 tsp Chili Powder
1 tsp Old Bay Seasoning
Instant Grits (4 servings)
Salt & Pepper (pinch)
1 cup (4 servings) of 2% or nonfat shredded cheese (Cheddar or your fav)
1/2 cup chicken broth (we use the cubes of broth that you just add water to, reduced sodium!)

Putting it together:

Slice the casing on the chorizo (if any) and remove it before cooking the chorizo in a pan with no oil for about 5 minutes, it should start to crumble, if it doesn’t use your spatula to break it up.
Add in chopped onion, peppers and seasonings (salt, pepper, garlic, cumin, chili powder, old bay) and cook until veggies are soft

Meanwhile, prepare the instant grits to specs on box MINUS the butter and finish with a serving of 2% or nonfat shredded cheese for each serving of grits. Mix the cheese in so it blends with your prepared grits.

Add your shrimp into the pan with chorizo and veggies along with 1/2 cup of chicken broth. Cook until the shrimp are done.

Pour shrimp, chorizo and veggie mixture over the grits and you are ready to enjoy!


Why it’s better:

So this meal is a little bit better than your restaurant version because we are not adding loads of butter and oil to the cooking process. We are also using a small amount of chorizo and reduced sodium broth and low calories/low fat cheese. If you wanted to make this even better for you, you could leave out the chorizo or the cheese in the grits. But the addition of the chorizo is a really interesting and different approach (most recipes I’ve seen do a little bit of bacon), so it’s a fun twist on a classic recipe.

Plus, you can make this meal ahead and microwave easily during the week for a delicious lunch at work! I promise it will make your co-workers jealous.

Enjoy!

Love,
-dRej


Pork & Plaintain Enchiladas

Ours actually looked pretty similar to this even though it's not our photo!

Alright – so despite the lack of posts, we have still been cooking up a storm. I just haven’t had much time to share the recipes. We’ll get caught up soon. One that we tried this week is from one of our favorite mags, Cooking Light.

They did a whole series of healthier Mexican food this month – so you know we were excited as that is one of our fav foods! We picked an enchilada recipe this week. You can find the ingredients and instructions here: http://www.myrecipes.com/recipe/pork-plantain-enchiladas-50400000120713/.

They were seriously delicious. There is something about pork tenderloin that I love so much! I never even used pork tenderloin in my meals before I started cooking with my husband – but you can buy them pre-seasoned or plain and add your own. So easy! And it’s a pretty lean cut of meat, so you don’t add all the excess fat/calories.

Would definitely recommend this recipe if you want to try a new healthier version of enchiladas! It also heats up well so you can bring it to work for lunch.

I will try to take some more pics of our meals this week and get you some more healthy recipe ideas! Happy cooking!


Turkey Sausage Pasta Bake (easy, peesy!)

Image

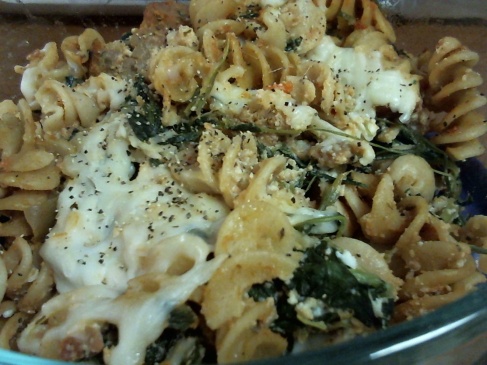
Quick & Easy Pasta Bake

You are right, this does look delicious.

Lucky for you, it’s easy to make and we’re going to tell you how. We didn’t follow a recipe on this one, it’s straight out of the dReJ Original Recipe book. But it’s really just a healthy version of your standard pasta bake – so feel free to change up the ingredients to reflect your preferences.

What you’ll need:

Turkey or Chicken Sausage (we used hot Italian turkey sausages that they stock fresh in our grocery meat department). They usually come with about 5 links in a package.

1 package spinach (we thawed out a package of frozen spinach because it’s cheaper than fresh!)
1 small container (15 oz) of Fat Free Ricotta Cheese
4 servings of a whole wheat pasta noodle (we went with rotini)
1.5 cups (you can do more or less depending on your preferences ) 2% skim shredded Mozzarella cheese
Seasonings (we went with Salt & Pepper + some Italian ones like oregano, parsley, etc.

3/4 – 1 cup Low Sodium or Low Calorie Marinara Sauce – pick one that is not loaded with sodium, fat and sugar! Check your label!

What to do with all that stuff:

Cook up your sausages – you can do this on the stove or grill them, use your George Foreman, etc. Once they are cooked, slice them into thin bite size pieces.
Cook your pasta and drain, add the marina sauce and stir until coated.

Meanwhile, put the spinach (make sure you’ve drained it so it’s not wet if thawing), ricotta cheese, 1/2 of the shredded cheese and seasonings into a large bowl and mix it up. It will be a little hard to stir, but you want it to be pretty mixed up. Once you have accomplished that, add the sausage (a little at a time) until everything is mixed together.

Pull out a casserole dish (something that is 9×13 will work – but you can work with whatever you have) and spread the pasta/marinara into the casserole dish evenly. Spoon the spinach mixture on top. Sprinkle the rest of the shredded cheese on top and bake for about 15-20 minutes at 375 or until it’s nice a bubbly.

We used a pretty big casserole dish, so when we cut it up, we actually had 2 thin layers. So when I put in our to-go containers for lunch, it sort of felt like lasagna because I stacked it. If you have a smaller casserole dish – you may end up with just one thick serving and that’s okay, too.

It all goes down the same way, anyway – right?

If you plan to bring this to work and heat up later, I recommend adding a tiny bit of water to the dish prior to microwaving it. It just helps everything stay good texture wise.

This meal was super easy to make, and took maybe a half hour total. You can make this dish healthier by using less cheese and leaner cuts of meat – or you can add on the  calories by doing the opposite. But since this is a healthy, cheap & delicious website, I won’t be encouraging that!

Enjoy!

Lunch @Work: Chicken & Broccoli Rice Bowl

We’re baaaaccckk! Today’s recipe is super simple. Not only is it easy to make, you can quickly change any of the ingredients to something you’d prefer.

Quick and easy for a work day lunch!

This is the recipe that inspired us from Cooking Light: Check it out!

So we didn’t really follow the recipe completely so here’s what we did:

What you’ll need to make 4 servings:

8oz. Chicken (you can buy it fresh and cook it up – we grilled ours) or you can make this SUPA easy and get a “ready to eat” grilled chicken from Tyson or something similar. If you aren’t sure what I mean – check this out. I used to buy these pre-made grilled chicken packages all the time to cut down on time and prep.

1 package of Broccoli – we just bought the bagged broccoli in the veggie section of the store. Ready to go!

1 onion – we went with a yellow onion

4 servings of instant brown rice (Like Uncle Ben’s)

2% shredded cheddar cheese

Then:
Cook up your chicken with your favorite seasonings – stay away from fatty sauces, try some cracked red pepper to spice it up!
Steam the broccoli (fill a deeper pan with some water and put the broccoli in it and turn on the heat to let it steam/cook) – chop it up into smaller bite size pieces
Saute your onions with just LITTLE bit of EVOO – MEASURE, you only need a teaspoon or two!
Cook your rice (instant rice takes about 8 minutes)

Mix everything together, add salt & pepper to taste and any other seasonings you may fancy.

Don’t like chicken? Try this with pork or beef. Don’t like broccoli? Swap out for a veggie you do enjoy.

I love these easy recipes because you can really do anything with them once you get the concept down! Plus, this is super simple to bring to work for a healthy lunch. Just microwave for 1-2 minutes, stir and enjoy.


Watch out for Chinese Food…try this instead!

image

Shrimp, Water Chesnuts, Bean Sprouts, YUM!


Last week at work, a few of my coworkers and I got into a discussion about calories. I found it interesting that a few of them were pretty off base on how many calories they assumed food had – particularly when it came to eating out at a restaurant. My rule of thumb is – it’s ALWAYS more than you think it is when you go out to eat. That’s why it’s so hard to count calories and stay on track when your actively trying to lose weight but you still want to have a life and enjoy lunch or dinner out.

I would say that Chinese food is one of those areas that are commonly underestimated when it comes to calorie content.  For instance, did you know that a typical egg roll has 200 calories and 400 mg of sodium? How many people start out their meals with an Egg Roll? Hands up, people!

Think a spring roll is a better choice? It typically saves you about 100 calories, but still rings in with 300mg of sodium.

So – if you are like me, you are thinking…soup can’t be that bad for me. And calorie wise, choices like Egg Drop, Hot & Sour or Wonton Soup aren’t terrible…about 100 calories per servings….but sodium content can be over 100mg!  Bad for your blood pressure, right?

RJ’s favorite meal to get when he eats Chinese is General Tso’s Chicken. 1,300 calories later along with 11 grams of saturated fat and 3,200 mg of sodium…..maybe it’s time to find a new favorite.

All the more reason to create healthier versions of the things you love at home. The recipe we found for Fried Rice (one of my favorite things to get) was in Cooking Light’s magazine in March but you can get it here: http://www.myrecipes.com/recipe/almost-classic-pork-fried-rice-50400000109596.

We subbed the pork for shrimp since we had some left over from last week that we needed to cook up, but this is a super easy recipe and lots of easy switch outs to make it your favorite. We skipped buying the ingredient, Mirin. For those who want to search it out … it’s a sweet cooking wine made from rice. Sake can be used as a substitute for mirin (with an added pinch of sugar). Or – you can just leave it out and I promise it will still be delicious 🙂

As i mentioned – we used shrimp instead, so when you look at the calorie exchange (rough estimate)…the pork alone would be about 66 calories per meal, and when you switch to shrimp, you are look at more like 120 calories for 4oz. So just make sure you are counting every switch!

This meal with the pork is about 400 calories, about about 460 with the shrimp instead. Not bad considering our brief lesson on how many calories Chinese food can have!

Happy Eating!

Chipotle Pork Tacos

image

Yummy Tacos on Corn Tortillas

Just because we gave up going OUT to eat Mexican food doesn’t mean we can’t make a healthier version of it at home. It’s hard to go wrong with Tacos – you can basically take this recipe and change it a million different ways and it will still end up being delicious.

Here’s the recipe from Cooking Light. We get the Cooking Light magazine every month, so this was a recipe featured in the April 2011 mag. http://www.myrecipes.com/recipe/chipotle-pork-tacos-50400000111089

299 calories for 2 tacos is pretty darn good. Sure beats the  calories at a typical Mexican Restaurant. I like making Tacos at home because you can always make it healthier by using a leaner cut of meat. Even if ground beef is your thing – you can just opt for a less fatty version. You can use part skim shredded cheese if you miss the cheese topping. You can buy fat free sour cream instead of full fat. You can add more vegetables – or make a veggie taco version for even less calories. Go with the corn tortillas like the recipe says because that will be a major calorie saving switch for you.

You can make this recipe a bit hotter by adding more than  teaspoons chopped chipotle chile in adobo sauce. If you don’t know where to find the chipotle chile in adobo sauce – look in the international aisle of your grocery and it’s usually in a little tiny can with the Mexican stuff. YUM! Chipotle is not a SUPER spicy pepper – so if you are looking to really heat it up, add a jalapeno or if you are like RJ, add a habanero!

For those that know RJ – he is a total chile head – so anytime the grocery store has awesome looking hot peppers, he brings one home determined to find “something” to cook it with. He decided to use it for the pork tacos this past week.  Since i’m not quite as advanced in my “take the heat” skills, he left it out of my servings for lunch. Unfortunately, I grabbed the wrong container for lunch and only made it about halfway through the tacos. It was full on tears and several days of avoiding anything remotely spicy after that. Lesson learned!! So just be careful if you are going to add some heat!

image

Serve with fat free refried beans!

Tag Cloud