Adventures of Eating with dReJ: healthy, cheap, delicious

Archive for the ‘Healthy food’ Category

Gallery

Cauliflower Rice

Try cauliflower rice instead of actual rice! Perfect low carb or low calorie option!


Since we’ve been doing the Paleo/Primal inspired eating, we’ve looked for ways to still enjoy some of our favorite meals like stir fry with rice, shrimp-n-grits – you know – the good stuff! So we aren’t eating any grains, so rice is out of the question. Corn in moderation so grits aren’t all that great of a replacement either.

I stumbled across something called Cauliflower Rice and despite the fact I am not a huge cauliflower fan, I figured why not give it a try? I used it in one of my primal quiche recipes and the flavor wasn’t overwhelming at all, so we decided to go for it as the accompaniment to our shrimp stir fry meal this week.

It is SUPER easy to do, and even if you aren’t avoiding wheat and grains – it’s a great way to knock out a TON of extra calories and that crazy full feeling you get when you eat all that rice. This also works for vegetarians and vegans! So anytime you see a recipe that calls for serving your food on a bed of rice, couscous, grits, etc – just sub this instead! You can easily bring it to work and heat it up again – still tasty!


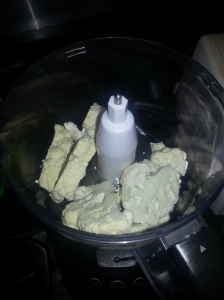
Put small roughly chopped pieces of cauliflower into your food processor. I did mine is several smaller batches to make sure I didn’t miss any big pieces!


The cauliflower should be like a grits/couscous sort of texture.

Once you have processed the cauliflower, put in microwavable bowl with lid and heat for 5-6 minutes. DO NOT ADD WATER! Once it’s done – season like you would regular rice and serve!

Enjoy!

Primal Meatloaf (with Brie & Mushrooms!)

I mentioned I was going to try out this recipe a few days ago and had several people ask for the recipe or to share how it went. We made it over the weekend and I ate it yesterday for lunch, so I feel more confident in sharing the recipe and results now!

Right out of the crockpot!


I can’t take credit for the idea – I found the recipe at PaleoPot and you can see the original post here. As usual, we made a few changes so I’ll include the original recipe and our changes in Green so you can take it or leave it, or invent your own variation!

What you need:

  • 1.5 pounds of 90/10 grass fed ground beef. Leaner cuts work better as the extra fat simply runs off in cooking anyways. (We used a mixture of beef and pork for ours)
  • 1 whole egg
  • 4 cups of button mushrooms. Any fungi of your choice will work fine. Buy less mushrooms if you are afraid of having extras! (I bought pre sliced mushrooms and used about 8-10 oz)
  • 1 small log of brie or goat cheese. Usually 2 to 4 ounces. Trader Joe’s sourced my small log of brie this time. (I used 40z of brie, found it at Harris Teeter!)
  • 1/8 cup granulated garlic (We used minced garlic from a jar – and we used probably 1-2 TBSP because we heart garlic)
  • 1/8 cup dried parsley (We didn’t have any of this in our spice cabinet, so we left it out)
  • 2 tbsp dried oregano (We grow  this, so we used fresh!)
  • 1 tbsp dried rosemary (again, spice fail! Didn’t have this one, and our rosemary isn’t growing very well…so we left it out)
  • pinch of sea salt and black pepper

Make this quick:

  1. By hand, mix together your beef with your egg and spices. Everything but the mushrooms and the cheese.
  2. Once mixed, press the meat mixture down into the bowl to flatten it out as evenly as possible. This also works on a countertop, yet I prefer to just get it done in the bowl for easy cleanup.
  3. Cut your mushrooms lengthwise into slices. Think pizza topping slices.
  4. Place your log of brie in the center of your flattened meat mixture, and fold the meat around it, fully encasing the cheese.
  5. Make sure your cheese is fully covered by meat, and if there is a “seam” or place where the cheese is closest to the surface, this place will be facing up in your slow cooker.
  6. Press your mushroom slices into the exterior of your meatloaf. The goal is to have the entire outside encased in mushroom slices, held only by the meat mixture.
  7. Cook on low for 6 hours. (We cooked ours for longer since we wanted to make sure the pork was completely cooked!)

As it’s cooking, some fat will run off and some cheese may ozz out. Just put it on top because Brie is amazing!


This was quite tasty – and easy to put in a to-go container for a work lunch or quick dinner. I would definitely use the herbs/spices recommended, or jazz it up with whatever you have on hand so you are still getting some yummy flavors. The first bit of the meatloaf, I was thinking – this is okay. Then the next bite, I got some brie and then I was thinking: YUM! So You may be want to put more cheese in it, or make sure it’s spread all the way through when you are prepping so that every bite is delicious! You could certainly experiment with different cheeses as well. I know my hubby was worried that it would crumble since we weren’t using breadcrumbs or anything, but it really wasn’t a problem! The mushrooms stick to the outside and it really did pop out of the slow cooker all in one piece!

Hope everyone enjoys this recipe and that you’ll pop over to Paleo Pot as well for more slow cooker ideas that fit in with a wheat free, primal/paleo diet! Isn’t it fun when your chosen eating style is also exceptionally delicious!?


Primal Breakfast Ideas

For those who may be avoiding wheat or just are tired of cereal for breakfast – I wanted to share a recipe for a crustless quiche or casserole (whatever you want to call it!)

I stumbled across 2 different recipes and have made them both (with a few modifications). I find that the one thing people always say when they hear we are eating wheat free/primal style now is that they just can’t get past the convenience factor of cereal and other typical breakfast items. Making an easy casserole or quiche on the weekend gives you breakfast the whole week and it’s a great way to slip in some extra vegetables! It’s perfect to bring to a party as well!

I can’t take credit for either recipe, the first is from Grain Free Foodies and the other recipe is from The Prime Pursuit.

Both are pretty similar in ingredients and cooking method and I’ll say that I made a second quiche this week for breakfast after trying out the Grain Free Foodie recipe last week and I got lots of compliments on the Prime Pursuit recipe at a work event this week, too!

Soooo good!

 Crustless Quiche (from Grain Free Foodies with my comments in green!)

INGREDIENTS:

4 eggs
1 can (14-16 oz) of coconut milk without additives (I get the Taste of Thai can from the international aisle)
1-2 T butter or fat for cooking
1/2 onion
1 cup diced meat (I prefer ham)   (I used andoille sausage last week and regular pork sausage this week – both are good!)
OR diced vegetables (bell pepper, asparagus, greens, or zucchini work especially well) (I put veggies and meat in mine – so go nuts as it’s never a bad thing to get more veggies in your belly for breakfast! I usually do peppers, spinach, onion, sundried tomatoes…)
1 cup of cubed cheese (I used cheddar cheese – leave the cheese out if you are doing true Paleo or dairy free)
1/2 tsp salt
other herbs and spices, optional  (I used fresh basil and oregano from our garden, red pepper flakes, some paprika, cumin)

METHOD:

1.  Preheat the oven to 375 degrees.

2.  Crack the eggs into a mixing bowl and beat in the coconut milk.  Mix in the cubed cheese, salt, and any other herbs or spices that you are using.

3.  In a 10 inch skillet (ideally cast iron), melt the fat and saute the onions for several minutes. (I didn’t use cast iron and it still worked out just fine.)

4.  If you are using vegetables, add them now and saute several more minutes, allowing any moisture to come out (such as with mushrooms).

5.  Turn off the heat, add your meat and stir, and then pour the egg mixture over the top.

6. Bake for 45 minutes or until an inserted knife comes out clean.

It’s really that simple. What I love most about this recipe is that it’s super easy to switch out ingredients to make it taste different or to please picky eaters. I was also impressed that it only used 4 eggs! I put mine in a square baking dish and we got about 8 servings out of it. I’m sure you could do more/less depending on how big of a breakfast you like!

The other recipe has a few more steps but I was really pleased with how it turned out.

Sausage & Spinach Breakfast Casserole (from The Prime Pursuit with my comments in green!)

1 head of cauliflower
3/4 c chicken stock or water (I didn’t use this because I followed the saute instructions below in her update)

1 lb sausage (I picked hot chicken sausage!)
5 cups raw spinach
6 ounces full-fat coconut milk (I prefer Taste of Thai brand)
4 eggs lightly beaten
juice of 1-2 lemons (i used one lemon)
2 tsp salt
2 tsp garlic powder (I used minced garlic and way more than 2tsp, but I heart garlic!)
1/2 tsp red pepper flakes
3/4 cup shredded cheddar cheese (I added this in – leave the cheese out if you are doing true Paleo or are dairy free)

Preheat oven to 350 and prepare a 9X13 baking dish by greasing it with coconut oil. (I just used pam spray and I actually made it in a circle/deep dish baking thingy because I wanted it to be more like a “pie” serving for my work event)

Wash, remove leaves, quarter, and core the head of cauliflower.  Pulse it in a food processor until it looks like grits.  Put all the cauliflower-grits in a pot, add 3/4 c chicken stock or water.  Simmer on low until tender, about 10-15 min.  Drain off excess liquid, set aside.  The grits can also be fried (see below).** (So you don’t need to put the grits in a pot and use the water or stock if you are going to fry them up!)

Brown and crumble the sausage.  Leave the sausage oil in the pan and add in the fresh spinach.  Stir until it wilts.

In a large mixing bowl,  add the coconut milk, eggs, and spinach mixture & cheese, stir well.  Add in the salt, garlic powder, pepper, and lemon juice and stir.  Add the cooled cauliflower-grits and stir well. (I didn’t cool my “grits” very much and it worked out okay)

Pour into the prepared baking dish, and bake for 45 minutes or until center is set.

**UPDATE:  I have recently been sauteéing the cauliflower “grits” in a frying pan instead of boiling them.  They retain the same texture, but have a toasted taste and appearance.  I like it much better.  Heat 2-3 tbsp of the oil of your choice (reserved bacon is best!!), and sauté the “grits” until they are done.  Let them sit, then toss/flip them every few minutes.

So I didn’t take a picture of this one before I took it into work, but I had multiple people ask me about the recipe. People said they loved the texture and it was a little spicy, too, which I think worked well. I would have never thought to use cauliflower to add texture AND a few extra servings of vegetable, but it worked GREAT! Awesome recipe.

Hope these recipes inspire you to cook a little in advance on the weekend so you can easily enjoy a healthy breakfast all week long! I know I definitely was happy to find some yummy and easy to follow recipes on Prime Pursuit and Grain-Free Foodies blog!
Easy Curry (Paleo & Wheat-Free Friendly)

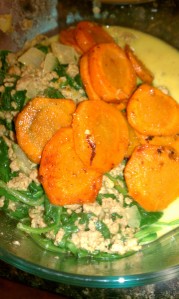
Quick Curry with Carrots


This weekend I selected a Quick Curry meal to be one of our lunch dishes for the week. It was really simple to make and didn’t take a long time or weird ingredients either. I found this recipe in the book: The Paleo Solution by Robb Wolf that I just finished reading.

Here’s what you need (and then below I’ll tell you what I added):

1 lb ground pork (you could use lamb, chicken, turkey, stew beef)
1 tbsp olive oil
1-2 tbsp curry powder
1 bag baby spinach (14 oz)
1/2 can coconut milk (7 oz)
2-3 cloves garlic


I felt like that wasn’t going to be filling enough for lunch – so I sauteed some carrots (bought fresh from the farmer’s market) with a little garlic, cumin & paprika seasoning and added those to the top of the dish. I also added some yellow onion to ours.

How to make it:

Easy peasy in the skillet


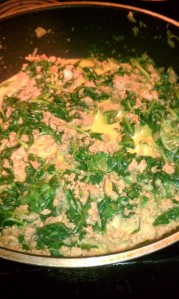
Cook up the meat in a pan with olive oil. Add the curry powder as the meat browns – mixing well. Be sure to break up any large pieces of meat – it needs to  be pretty crumbled up. If you are going to add onions – now is the time! Once the meat is browned, add all the spinach and coconut milk and heat until the spinach has wilted. Add garlic at the end (if you use fresh garlic – mince it or use a garlic press to crush it). Mix well, remove from heat and serve.

We ate this yesterday for lunch (just zapped it in the microwave at work!) and it was pretty good to not have any starches in it. When I think of curry dishes, I expect there to be rice – so this was definitely a change, but it was still a yummy meal. I sort of wanted MORE of it, but I’m guessing that my body will adjust after a week or so without the carbs from starches. Of course, if you aren’t avoiding grains – you could add some rice to this easily and make it work for your eating style.


We used ground turkey because the store didn’t have ground pork or chicken & we were lazy and didn’t feel like grinding it ourselves. I think pork/chicken might have a better flavor – but the turkey worked well if that’s what you have on hand!

There you go – super simple! The only thing you might have to go looking for is some coconut milk (hint: look in the international aisle with the Asian stuff).

Enjoy!


Pecan Encrusted Chicken (Wheat Free Recipe)

Finished product!

As promised, here’s the recipe for the delicious and filling Pecan Encrusted Chicken I made over the weekend. It reheated nicely – so it’s perfect to make in advance and bring to work for lunch!

Here’s the recipe:

Makes 2 servings (I doubled mine so we could have it for lunch twice this week as per our usual method)

2 four-ounce chicken breasts, boneless, skin removed
1 large egg
¼ cup coconut milk or dairy milk
½ cup ground pecans (can be purchased pre-ground)
3 tablespoons grated Parmesan cheese
2 teaspoons onion powder
1 teaspoon dried oregano
Fine sea salt and ground black pepper
4 tablespoons store-bought tapenade, caponata, or pesto

Preheat the oven to 350 ° F. Bake the chicken until cooked through, about 30 minutes. Lightly beat the egg with a fork in a shallow bowl. Beat in the milk. Stir together the ground pecans, Parmesan, onion powder, oregano, and salt and pepper to taste. Roll the chicken in the egg, then in the pecan mixture. Place on a microwaveable plate and microwave on high power for 2 minutes.

Recipe from: Davis MD, William (2011-08-30). Wheat Belly: Lose the Wheat, Lose the Weight, and Find Your Path Back To Health (p. 252). Rodale. Kindle Edition.

So there’s the recipe from the book – here are a few of my notes (from a not so awesome cook):

Who needs “pre-ground”, anyway? I got this.

I went to a regular grocery store, so they didn’t have “ground pecans.” I bought pecan pieces (look in the baking aisle & they are cheaper). I put them in my food processor and BAM – ground pecans. It never occurred to me I could still “bread” things on a wheat free diet – but after doing this with pecans, it would be super simple to use this method again.

I also didn’t have onion powder – so I just used some other seasoning salt, pepper mix I already had on hand and didn’t add in the extra S&P like the recipe called for.

Since you are baking the chicken – I decided to pound the chicken out flat so it would cook more evenly (seemed like a good idea at the time). A really simple way to do this? Spread your chicken breast out on a cutting board/flat surface and put a sheet of plastic wrap over the top of them. If you have a mallet – obviously this would be what it’s practical to use it for.  I didn’t know if we had one, and upon looking couldn’t find one. So I just used a strong serving spoon that had a pretty big flat edge and pounded the chicken that way. It worked. You could also use a small frying pan to do the job!

We don’t drink a lot of milk, and I didn’t want to buy a huge thing of coconut milk *because I’m not sure I’ll like it* or whole milk *because I don’t even like skim milk* – so I bought one of those kid sized drinks they have in the milk section. It worked perfectly for this recipe (I got the whole milk – and it was about 2 cups worth vs a gallon).

I also decided to use a Tapenade (versus pesto or that other thing listed in the recipe which I don’t even know what it is!) – I went with a Green Olive one, but you could pick out whatever floats your boat. You are just going to put it on top of the chicken after it’s all “breaded” and cooked anyway – so pick something you like because you will definitely be tasting it!

The longest part of this recipe is just baking the chicken – it took about 30 minutes. During that time – I cooked up some Brussell Sprouts with Bacon to have as a side. Delicious!

I hope you enjoy! And since I’m not usually the cook, I’d say that this recipe was EASY because I really didn’t have much trouble. What did people do before Google/YouTube? During this particular cooking adventure I looked up the following:

“How to ground nuts in a food processor”
“how to use a food processor” (I know, shame on me. But i’d never used ours before – I usually can’t even put it back together properly after we wash it lol)
“how to cut up raw chicken breast”

So – if i could figure it out, you can, too. And you’ll be glad you did, this recipe was awesome!

Zucchini Boats

We belong to a CSA and the last few weeks we’ve been overwhelmed with summer squash/zucchini. This week is no different. In order to do something beyond a casserole (which we’ve already done) or just cutting it up and cooking it in the pan (boring!) – I decided to venture onto Pinterest to see what other (and more creative) people are doing.

I stumbled across this recipe and wanted to share it!

http://prouditaliancook.blogspot.com/2010/05/tiny-tomatoes-big-taste.html

This particular post goes into details about different things to do with grape tomatoes, but I was more interested in what she was doing with the zucchini. You’ll find some pictures and the recipe I “interpreted” on the link above.

Some things I changed out – first off, I used both squash and zucchini and it seemed to work out just fine. I also didn’t have grape tomatoes and just used a regular tomato and cut it up into pieces that would fit onto the squash (not as cute, but still effective). I also added cracked red pepper to the garlic/olive oil/S&P “sauce” for a little spice in your life! Lastly, I picked some fresh basil from what’s growing on our deck and it was delicious!

My picture isn’t as awesome and delicious looking as hers (although it was totally tasty!) but just so you can see my handiwork (i.e. the totally uncrafty/nongourmet version):

Pairs well with your basic ham and cheese sammy!


Feel free to follow me at Pinterest: http://pinterest.com/theotherdre/. I often pin healthy recipes and fitness/health motivational tips!

Summer Squash and Broccoli Casserole

We’ve been getting a lot of squash and zucchini in our Spring CSA box the last few weeks. So we decided to put it to good use as a side this week for our meals. We found a makeover recipe that sounded tasty and gave it a whirl. Obviously we are sharing it with you because it was super simple and delicious….and of course – healthy!

The recipe comes from Taste of Home and you can view the original recipe here.

We made a few changes so I’m listing the ingredients and showing you our changes:

This recipe makes 15 servings – we cut this in half, so please make sure you take that into account if you want to make this!

Ingredients

  • 3 pounds yellow summer squash, cut into 1/4-inch slices
  • 2 medium onions, sliced (we used both red and yellow onion)
  • 2 tablespoons butter, divided (we used less better than this)
  • 2 garlic cloves, minced
  • 6 tablespoons all-purpose flour
  • 4 eggs
  • 4 egg whites
  • 2 cups 2% milk
  • 4 cups (16 ounces) shredded sharp cheddar cheese
  • 1/4 teaspoon salt
  • 1/8 teaspoon pepper
  • 12 reduced-fat butter-flavored crackers, crushed (we didn’t crush ours – see picture!)
  • We added about 1.5 cups (uncooked) broccoli (sans stems) to the very top of this mixture (well, right under the cracker “crust

Up close so you can see the yummy layers

We followed the directions provided on the website pretty faithfully other than reducing the amount of butter (since we didn’t make the crust “crushed” there was no reason to add the extra butter to the crackers) and adding broccoli. We actually added broccoli after we poured the egg/flour mixture on top of the squash/onions, but you could certainly add the broccoli before pouring the mixture over everything. I think it would taste good either way.

We had it on the side of our grilled hamburgers last night and it was super yum. We give this 2 dReJ thumbs up. At about 200 calories per serving this is a great side dish for a meal or a fun potluck dish to bring to share at a party.

Shrimp-n-Grits…and Chorizo!

In the south, it’s no big  thing to have Shrimp and Grits – it seems a common option when going out to eat. But it’s one I tend to avoid because I know it’s full of calories and fat I don’t really need. We are all about trimming down the calories and fat on some classics so you can enjoy them without the guilt!

So today – here’s our take on Shrimp n Grits. I’m actually eating it for lunch RIGHT now and it’s so delicious, I have to share.

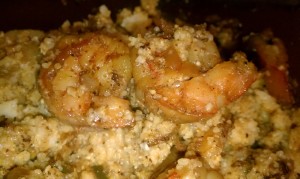
Delicious!

What you need:

2-3 oz Chorizo (our grocery store had this near the hotdog/specialty gourmet chicken sausages)
1 onion (yellow) – chopped
1 lb shrimp
1 green pepper – chopped
1 hot pepper such as jalapeno (optional)
1 tbsp minced Garlic (or to taste, we are garlic lovers)
1 tsp Cumin
1 tsp Chili Powder
1 tsp Old Bay Seasoning
Instant Grits (4 servings)
Salt & Pepper (pinch)
1 cup (4 servings) of 2% or nonfat shredded cheese (Cheddar or your fav)
1/2 cup chicken broth (we use the cubes of broth that you just add water to, reduced sodium!)

Putting it together:

Slice the casing on the chorizo (if any) and remove it before cooking the chorizo in a pan with no oil for about 5 minutes, it should start to crumble, if it doesn’t use your spatula to break it up.
Add in chopped onion, peppers and seasonings (salt, pepper, garlic, cumin, chili powder, old bay) and cook until veggies are soft

Meanwhile, prepare the instant grits to specs on box MINUS the butter and finish with a serving of 2% or nonfat shredded cheese for each serving of grits. Mix the cheese in so it blends with your prepared grits.

Add your shrimp into the pan with chorizo and veggies along with 1/2 cup of chicken broth. Cook until the shrimp are done.

Pour shrimp, chorizo and veggie mixture over the grits and you are ready to enjoy!


Why it’s better:

So this meal is a little bit better than your restaurant version because we are not adding loads of butter and oil to the cooking process. We are also using a small amount of chorizo and reduced sodium broth and low calories/low fat cheese. If you wanted to make this even better for you, you could leave out the chorizo or the cheese in the grits. But the addition of the chorizo is a really interesting and different approach (most recipes I’ve seen do a little bit of bacon), so it’s a fun twist on a classic recipe.

Plus, you can make this meal ahead and microwave easily during the week for a delicious lunch at work! I promise it will make your co-workers jealous.

Enjoy!

Love,
-dRej


Pork & Plaintain Enchiladas

Ours actually looked pretty similar to this even though it's not our photo!

Alright – so despite the lack of posts, we have still been cooking up a storm. I just haven’t had much time to share the recipes. We’ll get caught up soon. One that we tried this week is from one of our favorite mags, Cooking Light.

They did a whole series of healthier Mexican food this month – so you know we were excited as that is one of our fav foods! We picked an enchilada recipe this week. You can find the ingredients and instructions here: http://www.myrecipes.com/recipe/pork-plantain-enchiladas-50400000120713/.

They were seriously delicious. There is something about pork tenderloin that I love so much! I never even used pork tenderloin in my meals before I started cooking with my husband – but you can buy them pre-seasoned or plain and add your own. So easy! And it’s a pretty lean cut of meat, so you don’t add all the excess fat/calories.

Would definitely recommend this recipe if you want to try a new healthier version of enchiladas! It also heats up well so you can bring it to work for lunch.

I will try to take some more pics of our meals this week and get you some more healthy recipe ideas! Happy cooking!


Gallery

Spinach & Feta Pork Tenderloin Roll

Pork Roll Served with Brussels Sprouts & Mashed Potatoes

I’m a huge fan of pork tenderloin. It’s a lean meat  but has tons of flavor. Since the past few weekends have been nice, we’ve been on a “grilling” rampage so a pork tenderloin seemed like a good choice. Instead of just having a meat and potato kind of meal – we wanted to integrate some more vegetables. We belong to a fruits/veggie co-op so we had some fresh spinach to use this week. I’ll share a few pictures here and some general guidelines for putting this together. It was SUPER delicious, and reheated nicely for a bring to lunch meal. We picked two sides – mash potatoes and brussels sprouts – but you could easily trade out for 2 of your favorite sides!

What you need:
Fresh spinach (or thawed/drained frozen would work, too)
Garlic (to taste)
Feta (8oz package – look for the reduced fat kind!)
Seasonings: Salt, Pepper, Oregano, Red Pepper Flakes
Pork Tenderloin – at our grocery store they have pre-packaged pork loin that are seasoned – we like the peppercorn & garlic seasoned one! It’s usually about 18oz

So add the spinach, garlic and a little EVOO to a pan and wilt the spinach, mixing in the seasonings (salt, pepper, oregano and red pepper flakes).

Almost ready!

Slice open the tenderloin so you can add the stuffing!

Put the spinach mixture on the meat and sprinkle the feta cheese on top

Roll the pork loin up carefully (see right). Use skewers to secure it before you grill/cook it!

We grilled ours - you want it to be cooked through to 140 degrees. Be sure to rotate it so it doesn't burn!

Once cooked - slice it up and it's ready to serve!

Tag Cloud